Try Free Demo | 🚀 Try Pro Demo | Documentation
Sticky Buttons is a free WordPress plugin that lets you quickly create customizable floating buttons. These attractive buttons stay visible as visitors scroll your site, guiding users to essential actions and boosting engagement effortlessly.
🌟 Key Benefits:
- Easily create eye-catching floating buttons
- Increase user interaction and conversions
- Lightweight & optimized for performance
- Simple setup – works seamlessly with any theme
✅ Transform user experience with Sticky Buttons!
Main Features
Enhance your website’s navigation with the Sticky Buttons plugin for WordPress. Designed to simplify browsing, this plugin helps visitors easily find the information they need and navigate between sections with ease. Site administrators can fully customize the button menu to fit their specific needs.
🎨 Customization & Design
- Create unlimited sticky buttons.
- Choose from 4 different button shapes.
- Set individual button colors and backgrounds.
- Flexible Positioning: Choose between Fixed (Sticky), Absolute, or Static placement.
- Organize your menus using Custom Tags for quick filtering and management.
- Access over 2000 Font Awesome 6 icons.
- Add custom labels to each button.
🔗 Links & Accessibility
- Insert any type of link to buttons.
- Add custom attributes:
ID,class,aria-label. - Responsive Visibility: Control visibility by hiding or showing menus on specific screen sizes.
- Mobile-friendly and responsive design.
🛠 Efficient Management
- Bulk Actions: Quickly change status or test mode for multiple menus at once.
- Test Mode: Preview menus privately (visible only to admins) before going live.
- Export/Import: Effortlessly transfer your button sets between websites via JSON.
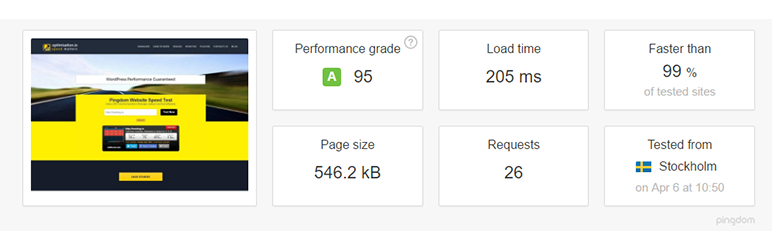
⚡ Performance & SEO
- Optimized for speed – doesn’t slow your website.
- SEO-friendly button structure to improve indexing.
—
Ideal Uses for Sticky Buttons
- Instant Messaging: Add quick-access buttons for WhatsApp, Telegram, Skype, or Messenger.
- Floating CTA: Keep “Book Now” or “Get a Quote” buttons always visible to boost sales.
- Mobile App Experience: Create a professional bottom or side navigation bar for mobile users.
- Quick Support: Provide easy access to your Help Center, FAQs, or Support tickets.
- Anchor Navigation: Build a floating table of contents to navigate between long page sections.
- Social Presence: Link to your Instagram, Facebook, LinkedIn, or TikTok profiles.
- Membership Access: Quick links for Login, Register, and User Account pages.
- Special Offers: Highlight time-limited promotions or discount codes.
Check the FAQ section below for step-by-step guides on how to set up these features!
—
Pro Version
Unlock the full power of Sticky Buttons with advanced features designed to elevate your site’s engagement and user experience:
🎨 More Customization
- Hold Label Open – Keep button labels always visible.
- Custom Icons – Upload your own icons to match your brand.
- Icon Animations – Enhance engagement with 7 elegant animation effects.
🔗 Enhanced Functional Links
- Translate Page – Instant, one-click website translation.
- Social Sharing – Easy sharing via Facebook, Twitter, LinkedIn, and more.
- Next/Previous Post – Smooth navigation between posts.
- Forced Download – Direct file downloads (ebooks, PDFs, software).
- Smooth Scrolling – Effortlessly scroll to specific page sections.
- Scroll to Top/Bottom – Quick page navigation buttons.
- Print Page – Convenient printing for your content.
- Font Size Adjuster – Allow users to customize page readability.
- Bookmark & URL Sharing – Simple bookmarking and URL copy actions.
🎯 Advanced Display Rules
- Scroll-Based Visibility – Dynamically show or hide buttons based on scroll position.
- Timer Action – Control button visibility after a specified time interval.
- User Role Permissions – Show or hide buttons based on user roles.
- Multilingual Support – Custom menus tailored for different languages.
- Scheduled Visibility – Automatically display buttons at specific dates and times.
- Activate by URL – Display buttons conditionally based on URL parameters or specific pages.
- Activate by Referrer URL – Control button visibility based on visitors’ referrer.
- Browser Compatibility Control – Automatically hide buttons for outdated browsers.
🚀 Upgrade to Sticky Buttons Pro and supercharge your website!
—
🚀 Maximize Results with Complementary Plugins
Enhance your website’s functionality and user engagement by combining Sticky Buttons with these powerful plugins:
- Popup Box – Create engaging, custom popups to boost conversions.
- Counter Box – Easily add counters, timers, and countdowns to highlight urgency.
- Calculator Builder – Build custom interactive calculators for your users.
- WP Coder – Add custom HTML, CSS, PHP and JS code to your site easily.
- Modal Window – Design beautiful, custom modal windows for capturing leads or displaying content.
👉 View all plugins by Wow-Company
✅ Combine Sticky Buttons with these plugins to build a highly interactive, engaging, and user-friendly website.
Support
Need help? Ask questions and get quick answers in our support center.
Installation Instructions
📌 Option 1: Install via WordPress Dashboard
- Go to your WordPress admin dashboard (
wp-admin). - Navigate to
PluginsAdd New. - Search for “Sticky Buttons” and click “Install Now”.
- After installation, click “Activate”.
📌 Option 2: Manual Installation (Upload)
- Download the plugin’s zip file.
- In your WordPress dashboard, go to
PluginsAdd NewUpload Plugin. - Select the downloaded zip file, then click “Install Now”.
- After installation, click “Activate”.
Alternatively (FTP):
- Unzip the downloaded plugin file.
- Upload the extracted
sticky-buttonsfolder to your server’s/wp-content/plugins/directory via FTP. - Go to
Pluginsin your WordPress dashboard and click “Activate” next to Sticky Buttons.
🚀 Getting Started
- Once activated, a new
Sticky Buttonssection will appear in your WordPress admin menu (on the left side). - Click “Add New” to create your first button set.
- Configure your buttons as needed.
- Click “Save” to finalize and display your sticky buttons on the website.