
Support | Demo | Recommended Plugins | Upgrade to Pro ⭐
Use My Sticky Bar (formerly myStickymenu) to create a beautiful notification bar for your website. You can also use this notification bar & sticky menu plugin to make your menu or header sticky on top of page, after desired number of pixels when scrolled. You can use it also to create a Welcome bar for announcements, promotion and more. This lightweight plugin will help your visitors navigate easily and reach to the navigation menu without wasting time. Install My Sticky Bar and improve your website’s user experience! If you want to change the CSS style, disable on scroll down or disable on specific pages. check out the Pro version.
By default, My Sticky Bar (formerly myStickymenu) should make your menu sticky right away if you turn the sticky menu feature on – which means your menu should become sticky right out of the box. Sticky menu is designed to use element class “.navbar” as “Sticky Class”. That value should be modified in plugin settings for different themes to make it work. Sticky Class is actually nothing more than an element class (or id) of the element that should become sticky.
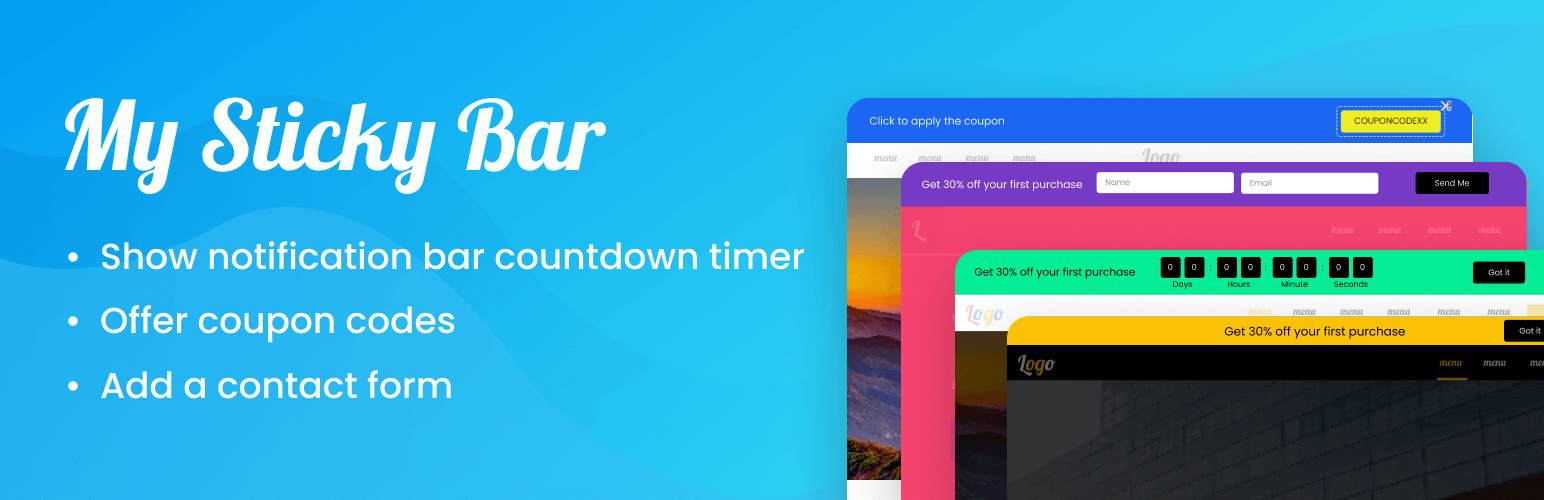
📢 Welcome Notification Bar: Use this powerful feature to create a beautiful floating sticky notification bar. Just turn the notification bar on, set up your announcement text and button, and voilà, your top notification bar is ready!
💪 BENEFITS
- Improve user experience by letting your visitors access the navigation menu and navigate to the pages they want when they want to.
- Make your website look more modern with the sticky menu on desktop and mobile.
- Increase number of page views and visitors’ time on your website
- Create your own floating Welcome Bar and let your visitors know about your latest deals, announcements, or any other important information
- The My Sticky Bar dashboard makes it easy for you to manage your top bars and sticky menus in one place!
The sticky header function is localized (multi-language support) and responsive (as far as your theme is). Also, there is the possibility to add custom CSS code which makes this plugin very flexible, customizable, and user-friendly. You can also use the notification bar in any language.
My Sticky Bar plugin will work on any WordPress theme, like OceanWP, Nirvana Template, Twenty Sixteen, Twenty Ten, Twenty Eleven, Twenty Twenty-Five, Twenty Twenty-Four, Twenty Twenty-Three, Max Magazine, Graduate, Lawyer theme, Spacious, Suits, and more.
My Sticky Bar is compatible with Elementor website builder, Divi, WPBakery, Gutenberg, Visual composer, Beaver, and other WordPress website builders.
🚀 WITH WELCOME BAR FEATURES YOU CAN:
- Display your floating bar at the top position
- When the user clicks on the welcome bar button you can close the bar, redirect to another URL, or launch a Poptin pop up
- New! Contact Form 📝 – Include a contact form in your notification bar to collect either name and email or name and phone number. This feature can improve lead generation on your website. You’ll be able to gather your users’ details using a contact form and reach them directly.
- Change the background and button colors for your hello bar
- Change display frequency after submission – show the announcement bar on every page, once a visit, or don’t show the announcement bar after it’s submitted
- Add an attention effect to your button and increase conversion and CTR
- New! Add any custom HTML to your notification bar including strong, underline, italic, and much more. Use custom HTML to create a beautiful notification bar
- Change font size and font family
- Set your own text and call-to-action button text
- Show the closing X on desktop/mobile
- Show the call-to-action button in your top notification bar on desktop/mobile
- Redirect your visitors to another URL on-click
📌 WITH MY STICKY BAR YOU CAN:
- Show sticky header when scrolling the page
- Fade or slide effect
- Disable at a small screen
- Choose when to make visible on scroll
- Change the font color when the menu is sticky
- Change the background color
- Change the opacity
- Change the sticky transition time
- Define the z-index of the sticky header
- Set an entrance effect for your sticky menu
- Write your notification bar announcements in different languages – we support both LTR and RTL formats
- New and improved dashboard – The new My Sticky Bar dashboard will help you manage your notification bars, top bars, and sticky menus better.
- New! Disable the sticky menu – You now have the option to disable sticky menu features if you want to use only top bars or welcome bars
- Many of our users use the welcome bar to announce about their Coronavirus COVID-19 updates. You can use the notification bar as a Corona Virus – COVID-19 banner to make sure your visitors are up-to-date.
👌 Welcome Bar Pro Features
- Multi Welcome Bar – Create a separate notification bar for different pages based on page targeting rules (E.g. separate notification bar for different languages, different product categories, and much more)
- New! Countdown timer ⏳ – Add a countdown timer in your notification bar for that much-needed sense of urgency. This new countdown timer notifications bar feature can really increase your conversion rate because it creates a sense of scarcity and urgency on your promotions.
- New! Sliding texts – Display multiple lines of content in your notification bar that can scroll automatically in your desired direction. You can use it to promote different products, as a news ticker, or any other changing content in your notification bar* New! Send contact form leads via email – you can get email notifications when a visitor fills out your notification bar contact form
- New! Add a discount coupon element 🎫 – This feature lets you add a discount code coupon to your notification bar. Reduce cart abandonment and improve sales by offering your users a coupon discount code when they need it
- New! Country targeting – Show or hide your notification bar for specific countries. Create unique notification bars for different countries and tailor your messaging to specific audiences
- Display your floating bar at the bottom position
- Change the height of the sticky notification bar
- Open redirect link in a new tab
- Show your notification bar just on mobile or desktop
- Show your notification bar on a scroll or after a few seconds
- Set an expiry date for your welcome bar, including settings a time zone
- Display your floating notification bar on specific pages
- You can set a thank you screen which appears after the button is clicked (can be used for coupons or any other message you want to show your visitors after they click on the button)
- Add a rel Attribute to your notification bar button
But wait, there’s more 😉
🔥 WHAT DO YOU GET IN THE PRO PLAN
- Disable floating menu on Desktop/Mobile
- Disable floating menu on scroll down
- Add CSS style to the floating header
- Disable/enable floating header on specific pages
Live Demo
A live demo for My Sticky Bar plugin and notification bar is available at Premio’s demo site.
🗓️ Countdown timer
Do you have a limited-period offer? Want to create a sense of urgency to boost leads in your notification bar? Add a countdown to your notification bar. A highly customizable feature that can be paired with your website’s theme and colors.
Apart from setting a global date and time-based countdown, you can also start an individual countdown for every unique visitor from when they arrive on your website.
🔒 My Sticky Bar is GDPR compliant
We don’t store any local data about your visitors. Any time your menu or notification bar appears on your site, the plugin will not store any local data about it.
Pro tip: You can use the plugin’s notification bar to let your website’s visitors know about your cookie policy 🙂
📧 Grow your email list using the notification bar contact form
Collect valuable visitor information from your website, by giving them access to a contact form at any time, anywhere. The notification bar contact form helps you get leads into your local database. Create effective marketing campaigns and to contact your website visitors. Using the contact form in combination with features like a countdown, coupons, and other powerful notification bar options gives you a powerful way to convince users to share their lead information with you.
When a visitor fills in their details (email, phone, name, etc.) on the welcome bar, if you’re using the Pro version you can get the lead sent to your email.
This helps you get notified as soon as a visitor shows interest in your website. It is an extremely useful tool in your arsenal to convert leads quickly as soon as they enquire about your services or products.
🏷️ Show and Copy Coupons & Discounts Codes
Get your visitors to use your coupons in the least amount of time and clicks without hassle! Your visitors can simply copy the coupon or discount code from the welcome bar with just one click. This feature also displays a message to the user that the coupon has been copied to their clipboard, making their journey on your website extremely pleasant.
🎯 Page targeting & triggers
With the Pro version, choose to show or not show the widget on specific pages using various targeting rules. With our smart rules, you don’t have to spend hours defining all the pages for targeting; simply define what a page URL should contain and cover targeting for all relevant pages. A very powerful feature that helps you personalize your website’s experience for different types of visitors.
Use triggers to set events at which your widget pops out. Do you think your visitor might be potential lead if they scroll through 75% of your website? Show them a coupon from the welcome bar by triggering it.
🔝 Sticky Menu
Easily adds a sticky menu/header to any theme using My Sticky Bar. Make your website look modern and increase accessibility by adding a menu that sticks even when the user scrolls.
🤗 Testimonials
“Works great.
One of the key elements that I consider when choosing a theme is the sticky menu option. If the theme doesn’t have it normally I don’t use it. But now that’s not a problem for me anymore.”“This plugin rocks!
This plugin does exactly what it should. It is simple but powerful. I would suggest to anyone who wants to make their navigation menu sticky! I especially love the hide header on scroll down, show on scroll up feature that is built it. Great work!